Index Menu
Back
Main Menu
Forward
 
TUTORIAL: How to Make a 3D Enema
 
                                    P  R  E  M  I  S  E

So you want to make a 3D Enema? Certainly it's a few eccentric request,  but as my ancestors, 
the ancient Romans,  they said "De Gustibus Not Disputandum Est", so let's go! The goal to be 
reached is that to model a 3D Enema,  using  Lightwave © Modeler,  of Newteck Inc. ©, without 
the aid of any plugin,  but using only the options and the tools supplied with basic program. 
This tutorial  is good either for Pc  or  for MacIntosh computers.  Click with mouse on small 
picture near the words and you can see them more large.
                                 P  R  O  C  E  D  U  R   E
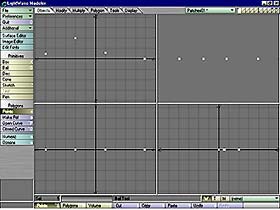
Open Lightwave Modeler,  go to "Objects"menu ,  click on 
the left, in "Polygons"submenu ,  on the "Points" button 
and then on "Numeric" button (from keyboard letter "n"). 
Click within a Modeler window with left mouse button and 
then correct numerically  the coordinates  of point that 
it appears,  putting  in the values  written under here, 
then  click  with the right mouse button  to confirm the 
creation  of that point.  Repeat  the same operation for 
each of the other points. Create four points using these 
settings: Point 01: X=-100 mm, Y=0, Z=8,5 mm.  Point 02: 
X=-40 mm, Y=0, Z=40 mm. Point 03: X=20 mm, Y=0, Z=12 mm. 
Point 04: X=100 mm, Y=0, Z=0 mm.
Image01
Image02
 Click,  with  all  four  selected  points  and always in 
 "Polygons" submenu,  on "Open Curve" button. So you will 
 create your spline in order to create your 3D enema. 
Enable  "Selection Polygons" mode  low  to the center of 
your screen,  select your basic spline, click once only, 
low to the screen,  on the "Copy" button and always only 
once (Attention,  one time only!) on "Paste" button.  Go 
to "Modify" menu,  click on  "Rotate" button and then on 
"Numeric" button (from keyboard letter "n").  Set up the 
following values:  Angle=90, Axis=X, Center=0 for X,Y,Z. 
Click on "Apply".
Image03
Image04
 Now  on your screen 2 splines  will appear  and not more 
 only one.  Select both them with mouse.  Repeat the same 
 procedure  described  to point 3,  but on all two curves 
 selected  at the same time.  So make  first "Copy", then 
 "Paste"  and  at last  "Rotate",  using  the same values 
 applied to point 3 and finally click on "Apply". You now 
 will have  4  splines on your screen.  These will be the 
 basis to operate the necessary "Rail Extrude."
However, before you will have  to create the basic shape 
to extrude, that is a disc. Therefore select a new Layer 
up to right,  as main Layer,  then go  to "Objects" menu 
and  click,  in "Primitives" submenu,  on "Disc" button. 
Click on "Numeric" button  and  insert following values: 
Axis:X. Sides=24. Segments=12. Bottom=-100mm, Top=-100mm 
Center X= -100 mm, Y=0,  Z=0.  Radii: X=0,  Y = 8,5 mms, 
Z = 8,5 mm. On your screen  it will  now  appear a disc. 
Close "Numeric" window.
Image05
Image06
 Let as main the Layer  with the disc now created and set 
 as secondary the Layer  with the four Splines previously 
 created.  (The small superior triangle  on the button of 
 every Layer  makes  that Layer as main,  while the small 
 inferior  triangle   makes  it   as  secondary).  Go  to 
 "Multiply" menu and click on "Rail Extr" button.  Set up 
 the following values:  Segments: Lenght  and  Automatic. 
 Strenght = 2. Oriented = Yes and Scaling = Yes. Give OK.
Now the semicomplete shape  of your 3D enema will appear 
on your screen.  Now it is necessary to give him a basic 
color.  This  will be made  only  in a mathematical way, 
without bitmap textures, but it is possible obviously to 
apply on the object also this kind of textures. 
Image07
Image08
 Select with your right mouse, into a circle, polygons of 
 the tip of your 3D enema, how it's showing in the figure 
 here to side.  Press "q" button  from keyboard and go in 
 "Change Surface" mode,  then insert a new name for these 
 polygons, as "Tip" for example. Give OK.
Go to "Tools" menu and, in "Selection" submenu, click on 
"Invert" button to select quickly all the other polygons 
of your 3D enema.
Image09
Image10
 Press "q" key from keyboard  and  go in "Change Surface" 
 mode.  Insert a new name  for these polygons,  as "Body" 
 for example. Give OK.
Go to "Objects" menu,  select on the left of your screen 
the "Surface Editor"  button,  then  select  "Body", and 
click  on the colored  small square  next to the "Color" 
panel and create  a beautiful plastic orange color, with 
these values: Red = 222, Green = 133 and Blue = 73.
Image11
Image12
 Always  in the "Surface Editor",  select "Tip",  that is 
 the  tip  of your 3D enema,  click on  the small colored 
 square near  to the "Color" panel and click on the black 
 color. Come out of color selection and insert the values 
 of Specularity = 40 and Glossiness = 40.
Come out  of "Surface Editor" menu  and  you will see on 
yours screen the orange and black colored enema. However 
there is something of wrong.  Your 3D enema it ends with 
a too much acute tip!!  I shudder thinking about what it 
could  cause  if  it  was  put  in action in this way...   
Therefore it's absolutely necessary to make its tip less 
ravaging and this will be made with a simple Subtracting 
Boolean Operation.
Image13
Image14
 Go to a new Layer, select him as main Layer and make the 
 Layer  with  your  3D enema  as  secondary Layer.  Go to 
 "Objects"  menu,  in "Primitives" submenu,  and click on 
 "Box" button.  Create,  also without  "Numeric",  but in 
 visual way, a cube that contains the portion of tip that 
 you want to eliminate: after all the 3D enema is your 3D 
 enema and you only know that degree of sharpness you are 
 able to bear in your 3D enema!!! Once created your cube, 
 you can deselect the "Box" button,  clicking again on it 
 with your mouse.
It is now necessary to make the created cube of the same 
material of the tip to cut, otherwise,  cutting the tip, 
you will get polygons with a wrong surface. So press "q" 
key  and  select  the "Tip"  name,  that is  the one you 
assigned previously to tip of your 3D enema. Give OK.
Image15
Image16
 Invert the order  of the Layers, that is set as main the 
 Layer  with  the 3D colored enema  and  as secondary the 
 Layer with the cube just created. Go to "Tools" menu and 
 click "Boolean" button.  Choose "Subtract" operation and 
 give OK.
And Voila'!  Here is  your quite ready 3D Enema. You can 
make any use of it you want!  But, please, don't tell me 
your intentions!! ... Jokes apart, this is, probably the 
most hilarious  3D tutorial  that  I have never written, 
but really, in spite of all that, it is rigorously exact 
in its 3D modeling features.  It means  that  it is also 
possible to learn something smiling  and  without giving 
us too much importance!
Image17


Indietro
 
Avanti

I have written this page in Italian language and after I have translated it in English language.
If you find some my translation's error, excuse me and send me an e-mail with the correct version. Thanx !!
Please Remember That Everything On This Web Site Is Copyrighted.


All rights reserved. Copyright © 2000 by Francesco Franceschi.